That Clunk Isn't Your U-Joint: Tracking Down a Dead Transmission Mount
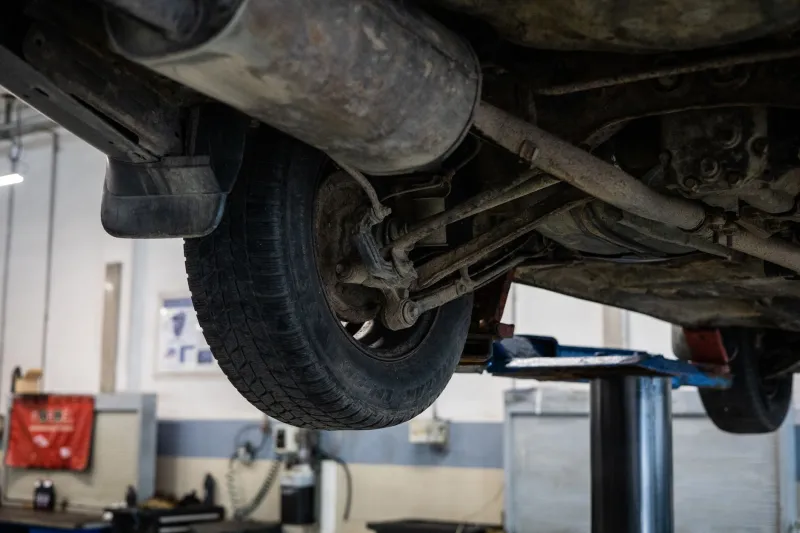
A Silverado rolls into the bay with a complaint that reads like a transmission death sentence: clunk when you tip into the throttle, a shimmy at 55, and something that feels suspiciously like slip between second and third. The service writer is already pricing a reman. Ten minutes later, a tech has a pry bar wedged between the crossmember and the tailhousing, and the whole job turns into a $45 rubber brick and a half hour of labor. It happens more than anyone likes to admit, and it's the reason the transmission mount deserves a spot on your diagnostic checklist alongside the U-joints and the fluid.
The Rubber Brick Nobody Looks At
The transmission mount lives between the tail of the gearbox and the crossmember, and its only job is to hold that tail in place while the powertrain tries to rotate the opposite direction under load. Every time you stab the throttle, the engine and trans twist against their mounts. Every time you brake hard or drop it into reverse, they twist the other way. That mount is a wear item just like a bushing or a ball joint, and it lives in a hot, oily neighborhood where rubber ages out fast.
When the rubber separates from the steel, the mount doesn't fail dramatically. It just gets soft, then soft and saggy, then soft, saggy, and clunky. And once the tail of the transmission starts moving around, every symptom it creates looks like something else.
Symptoms That Point the Wrong Direction
A collapsed mount doesn't announce itself. It imitates. Here's what owners and techs report most often:
- A clunk on light throttle tip-in. Sounds exactly like a sloppy U-joint or a worn slip yoke. It's the tailhousing slapping the crossmember as load comes on.
- A shudder or buzzing at cruise. Reads as TCC lockup shudder or a bad converter. It's often the mount loading and unloading as the driveline moves.
- A vague slip feeling between shifts. The transmission isn't slipping — the whole assembly is rotating a few degrees before the driveline catches, and your butt dyno reads it as slip.
- A clunk over driveways and speed bumps. Easy to blame on sway bar links or shocks.
- Vibration that changes with throttle but not speed. Classic driveline angle complaint, and a sagging mount changes that angle.
The dangerous part isn't the symptom list — it's that each one of those has an expensive cousin. A shop that chases the U-joint, then the converter, then the valve body will burn a customer's budget before anyone looks at the mount.
Load Reversal: The Cheap Test That Tells the Truth
Before you put a wrench on anything, do a load reversal with a helper. Chock the wheels, set the parking brake, hold the brake pedal hard, and have someone watch the tailhousing while you do a brief power-brake in Drive, then Reverse. Short bursts, no heat. You're looking for the tail of the transmission lifting a quarter inch or more, or the mount visibly squirming under the crossmember.
On a healthy mount, the tail moves a little — that's normal compliance. On a dead one, you'll see daylight open up under the rubber, or the whole assembly will rock like a rocking chair. If your helper says "that's not supposed to do that," you've found your clunk.
Pry Bar Diagnosis in the Bay
Hands-on inspection beats eyeballs every time. Get the vehicle in the air, support it properly, and slide under with a long pry bar.
- Look first. Find the mount and check the rubber for cracks, tears, oil saturation, or separation from the steel plate. Heat cracking is normal; full separation between rubber and metal is not.
- Pry gently. Wedge the bar between the transmission tail and the crossmember and apply controlled force up and down. You're checking for excessive movement — more than about an eighth of an inch of slop is a red flag. Don't horse it; you're testing rubber, not bending a frame.
- Check the crossmember bolts while you're there. Loose hardware mimics a bad mount and costs nothing to fix.
- Look at the neighbors. Cooler lines, shifter cable brackets, and exhaust hangers all ride on that mount. If the mount is gone, those parts have been flexing too.
What a Collapsed Mount Drags Down With It
A flopping tailhousing doesn't just make noise. It changes the angle between the transmission output and the rearend pinion, which is exactly what your U-joints don't want. It puts stress on the slip yoke and the output shaft bearing. It yanks on cooler lines and shifter cables that were never designed for that much movement. On some trucks it lets the tailhousing kiss the floorpan or the crossmember, and on a few it wrecks the mount bracket itself.
In other words, the cheap part fails first and takes expensive friends with it if you ignore it. That's the argument for checking the mount every time you're under a vehicle with a clunk complaint, not just when you've run out of other ideas.
Replacement Notes for Common US Iron
The good news: on most rear-drive trucks and SUVs, the mount is a straightforward job. Support the transmission with a jack and a block of wood under the pan — never the pan alone on a plastic-pan unit — then unbolt the mount from the crossmember and the tailhousing. Some applications want the crossmember dropped to get the mount out, and a few will fight you on exhaust clearance. On F-150s and Silverados, it's usually a 30-minute job with hand tools. On car-based unibody stuff like a Camry or an Explorer, the mount is often tucked tighter and may need the crossmember loosened to sneak it out.
A few tips that save callbacks:
- Match the mount to the application. Hydraulic and solid mounts are not interchangeable, and a stiffer performance mount will transmit noise the customer didn't have before.
- Inspect the bracket and crossmember for cracks or elongated holes while the mount is out.
- Torque the fasteners to spec and use a threadlocker on the crossmember bolts — these see constant load reversal.
- Recheck driveline angle if the old mount was badly collapsed. The new mount restores the original height, but if the crossmember was shimmed or swapped, verify.
- Take a test drive with the same load reversal you used to diagnose it. You should see normal compliance, not a rocking chair.
The Takeaway
A transmission mount is one of the cheapest parts on the vehicle and one of the most convincing liars in the driveline. Before you sell a rebuild, a converter, or a set of U-joints, spend five minutes with a pry bar and a helper. If the rubber has separated and the tail is flopping, you've just saved your customer a four-figure bill and earned a repeat visit. If it passes, then you can chase the expensive stuff with confidence — and you'll know the mount isn't the culprit hiding in plain sight.